The description underneath is for XWisp2 for Windows.
First you have to make a folder with the name "XWisp2" in the "Program Files" folder by your own:
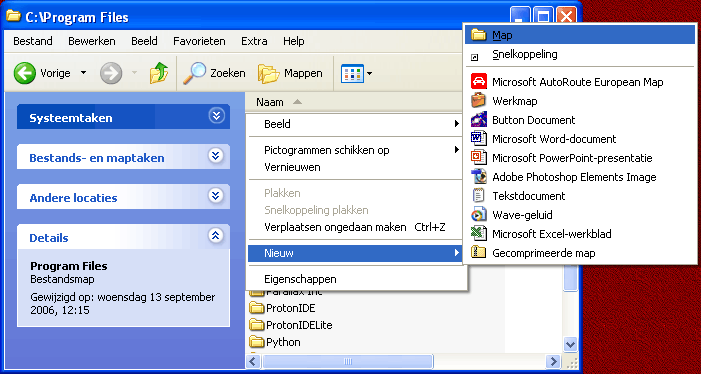
1. Open the folder "Program Files" (which stays mostly on the C: disk).
Click on the right mousebutton and select "New" and then "Folder".
2. Give the new folder the name "XWisp2".
or
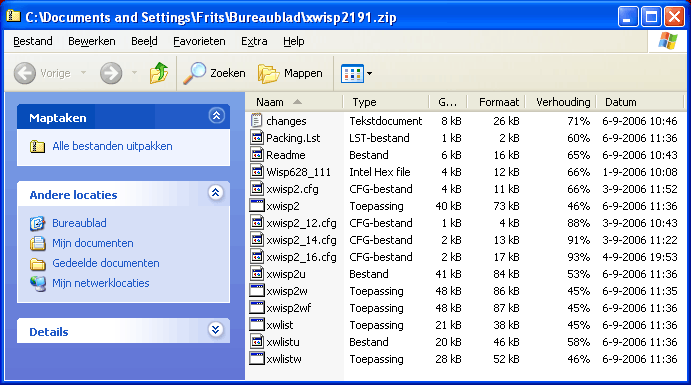
3. Open the folder from XWISP2 which you have downloaded.
(It's possible you have to unzip it first).
4. Select all by doing CTRL + "A" and copy it with CTRL + "C"
5. Open the just made "XWisp2" folder and give CTRL + "V".
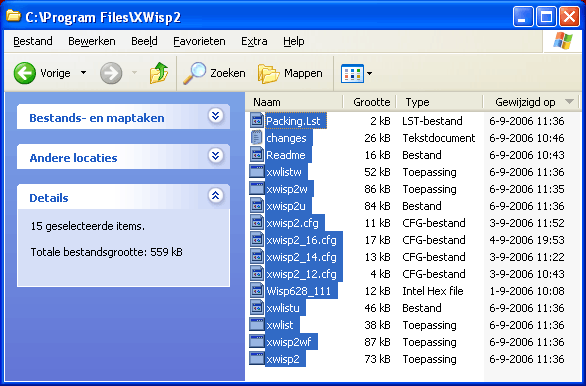
Doing this will place the unzipped files in the "XWisp2" folder.
That's all!
It is recommended to program firmware V1.30 in the PIC from the Wisp programmer itself.
You can download it here.
XWisp2 is now installed.
Now we have to connect XWisp2 to PIC Basic.
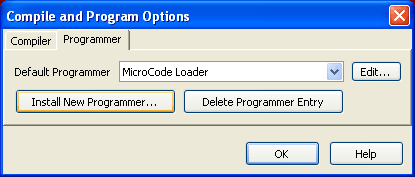
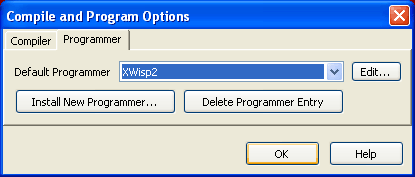
Select View in the menu bar from Proton PIC Basic IDE and next Compile and Program Options...
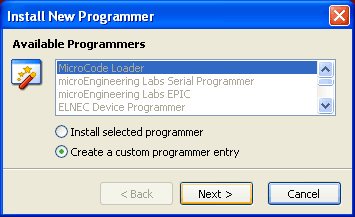
1. Click on tab Programmer and then click Install New Programmer...
2. Select Create a custom programmer entry and click Next >.
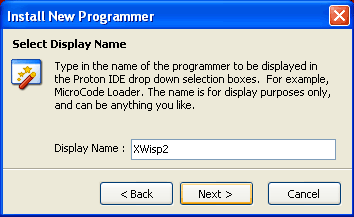
3. Type the name XWisp2 and click Next >.
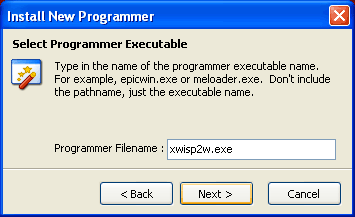
4. Type filename XWisp2w.exe and click Next >.
The 'w' after 'xwisp2' means that you've the Windows version,
because there are also versions for the platforms Linux and eComStation.
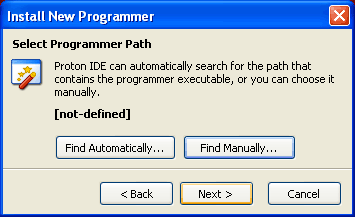
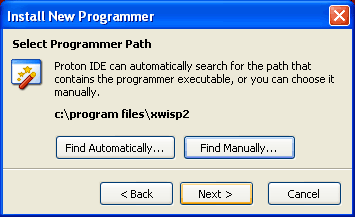
5. Click on Find Manually...
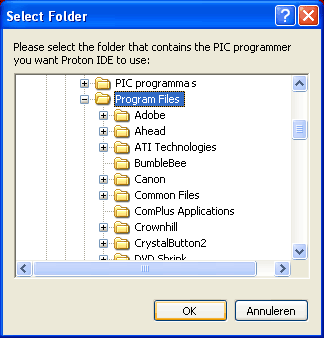
6. Search the XWisp2 folder.
Normally in the Program Files folder.
Open the folder Program Files by double clicking on it.
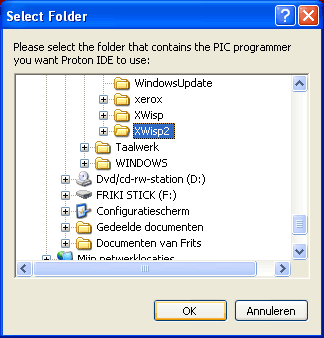
7. Search the foldername XWisp2 (not XWisp) and click on it so that it becomes blue and click next on OK.
8. Check if there stays c:\program files\xwisp2 on the screen.
If it's not then you've done something wrong (< Back).
Is it allright then click Next >.
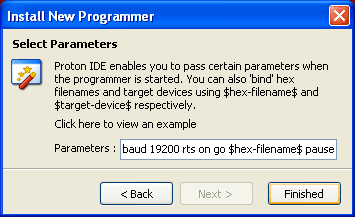
9. Type the next line because the one in above picture is not complete:
For Galva-Wisp:
For Wisp628/648:
baud 19200 rts on go $hex-filename$ pause " "
go $hex-filename$ pause " "
Sometimes it's also necessary to place the used COM-port in this parameter line.
If the programmer is connected with i.e. COM-port 3 then place port 3 on front of the parameters.
Eventual you can leave parameter pause " ".
XWisp2 will then closes itself when the PIC succesful is programmed.
You may place text between the quotation marks, i.e. pause "Done !".
This text is put on screen after the PIC succesful is programmed.
When you've done all this, click Finished.
10. Finally click OK.
From now on you can run XWisp2 in the PIC Basic IDE
by pressing F10 (with compiling) or F11 (without compiling).
F9:
Compile the currently active editor page.
The compile button will generate a *.HEX file.
F10:
Compile the currently active editor page, generate a *.HEX file and
run xwisp2w.exe which programs the PICmicro.
(F10 is a combination from F9 and F11)
F11:
The F11 key runs XWisp2 automatically, without compiling.
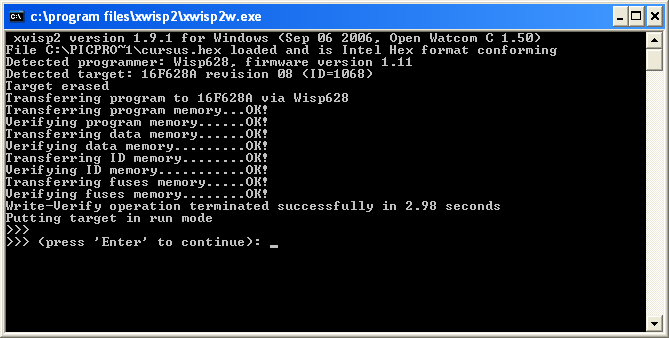
PIC programmed succesfull.
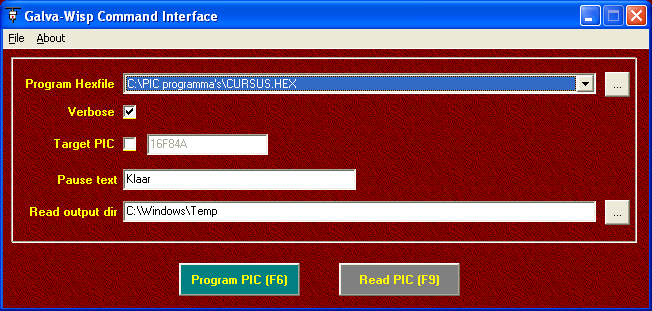
Program tool
Tool for those who use the Galva-Wisp not with PIC Basic, i.e. with another programminglanguage.
On this way it's easier to start the XWisp2 software.
This tool is not necessary if the Galva-Wisp is connected to PIC Basic IDE,
described in the procedure here above on this webpage.
This tool is made by Eddy Nijland (picsels, freeware).
Press F6 to program the PIC with the HEX file which is filled in after 'Program Hexfile'.
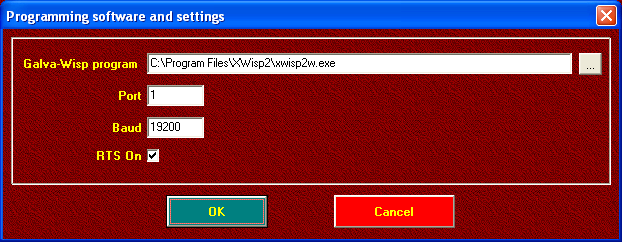
Settings has to be done only once.
Give the foldername where xwisp2w.exe is placed on your computer.
Set speed to 19200 Baud and RTS has to be activated.